Submitting an agent to Leaderboard 1.0
This page covers submitting an agent to Leaderboard version 1.0. If you are intending to use the latest Leaderboard version 2.0, please go to this Submit guide.
By submitting your agent to the CARLA Autonomous Driving Leaderboard you are accepting the terms of use.
Submissions to the Leaderboard 1.0 will be closed for now, you may still use Leaderboard 1.0, but you will not be able to submit your agent to the public Leaderboard cloud.
General steps
In order to create and submit your agent you should have a copy of the leaderboard project and scenario_runner. If this is not the case, please visit the Get started section first.
Index
1. Create a dockerfile to build your agent
In order for the CARLA leaderboard to evaluate your agent, it needs to be encapsulated within a docker image. For a successful one, you will have to be able to run your agent with the leaderboard inside your docker. You can either create your image from scratch, or follow the guidelines below:
-
Create a new directory to host your code. For a submission to be valid, it is necessary to create this directory outside the
${LEADERBOARD_ROOT}. We will refer to this directory as${TEAM_CODE_ROOT}. -
Find the dockerfile at
${LEADERBOARD_ROOT}/scripts/Dockerfile.master. This template serves as a starting point for users. Here all the dependecies needed for scenario runner and leaderboard have already been set up. Include the dependencies and additional packages required by your agent. We recommend you add the new commands in the area delimited by the tags “BEGINNING OF USER COMMANDS” and “END OF USER COMMANDS”. -
Update the variable
TEAM_AGENTto set your agent file, i.e. the entry file that inherits from AutonomousAgent. Do not change the rest of the path “/workspace/team_code“. If your agent needs a configuration file for initialization, set the variableTEAM_CONFIGto the configuration file. -
Make sure anything you want to source is inside
${HOME}/agent_sources.shas sources added anywhere else will not be invoked. This file is automatically sourced before running the agent in the cloud.
Please take note that any changes you make to the Leaderboard or Scenario Runner repositories will be overwritten when you submit your entry to the cloud.
1.1 ROS Stacks
As stated above, all sources have to be inside ${HOME}/agent_sources.sh. In order to source ROS, you can add the following command to your Dockerfile, which creates the file and sources the ROS environment:
RUN /bin/echo \
  'source /opt/ros/$ROS_DISTRO/setup.bash; \
  source $TEAM_CODE_ROOT/install/setup.bash;' >> ${HOME}/agent_sources.sh
This is a template to source the ROS environment and your agent. Feel free to modify it in case your setup is different
2. Build your agent into a docker image
Once the dockerfile is ready, make sure that all the needed environment variables are correctly defined, i.e. ${CARLA_ROOT},
${SCENARIO_RUNNER_ROOT}, ${LEADERBOARD_ROOT}, and ${TEAM_CODE_ROOT}.
The simplest way to do so is to add them to your ${HOME}/.bashrc file.
export CARLA_ROOT=...
export SCENARIO_RUNNER_ROOT=...
export LEADERBOARD_ROOT=...
export TEAM_CODE_ROOT=...
Feel free to adjust this script to copy additional files and resources as you see fit.
Then, invoke the make_docker.sh utility as follows:
${LEADERBOARD_ROOT}/scripts/make_docker.sh
This will generate your docker image, creating the docker image under the name
leaderboard-user.
You can test your docker image by running the leaderboard locally at your computer
3. Register a new user at Eval AI
Our partners at Eval AI have developed the user interface for the leaderboard. To make a submission you need to register a user on the website. Make sure to fill in your affiliation, otherwise you may not be accepted to participate in the challenge
4. Create a new team
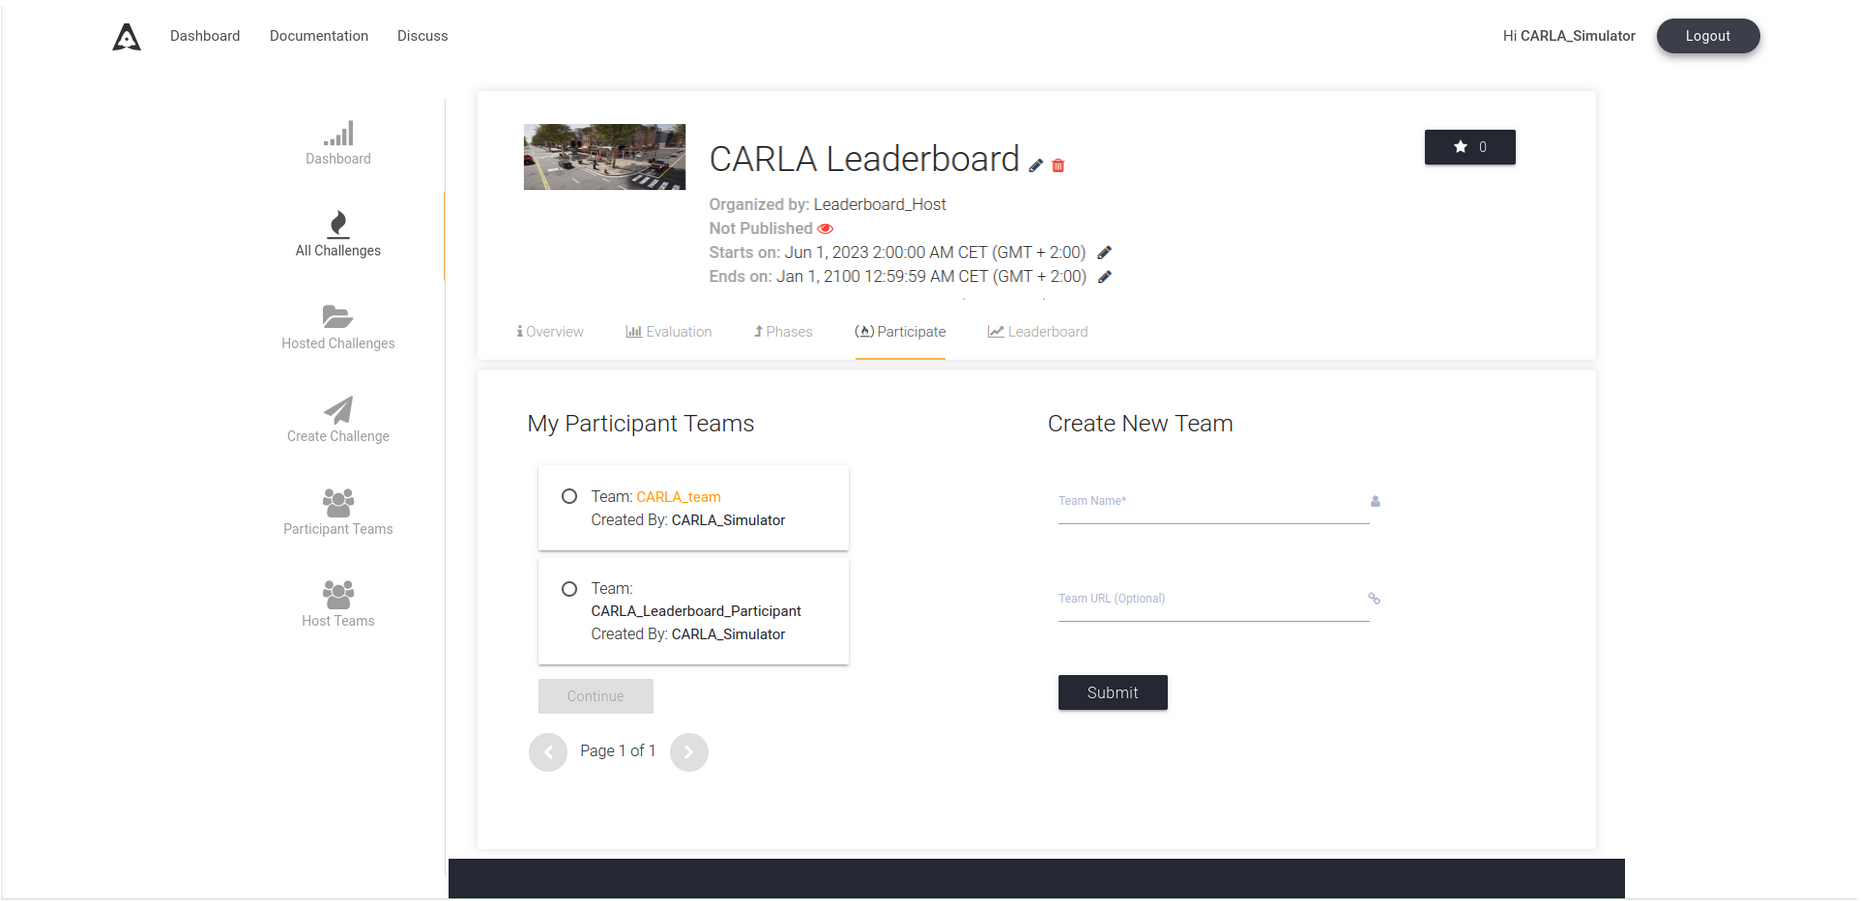
After registering a user at Eval AI create a new team by clicking in the Participant Teams section as shown below. All participants need to register a team in the CARLA Leaderboard 2.0.

Team creation screen in AlphaDrive UI.
5. Apply to the CARLA Leaderboard
Go to the All Challenges section and find the CARLA Leaderboard challenge, or use this link. Select Participate, then choose one of your participant teams to apply to the challenge. You will need to wait for your team to be verified by the CARLA Leaderboard admins. Once your team is verified, you can start to make submissions.
Benchmark section.
6. Make your submission
Once your team has been verified, you will be able to submit. In the Overview tab you will find general information about the CARLA leaderboard, got to the Submit section to make your submission. There you will find instructions to submit.
You will need to install the EvalAI CLI with pip:
pip install evalai
Next, you need to identify your user with your token using the following command:
evalai set_token <token>
You can retrieve your token from the Submit section of the EvalAI website. You may copy and paste the command directly from the submission instructions:
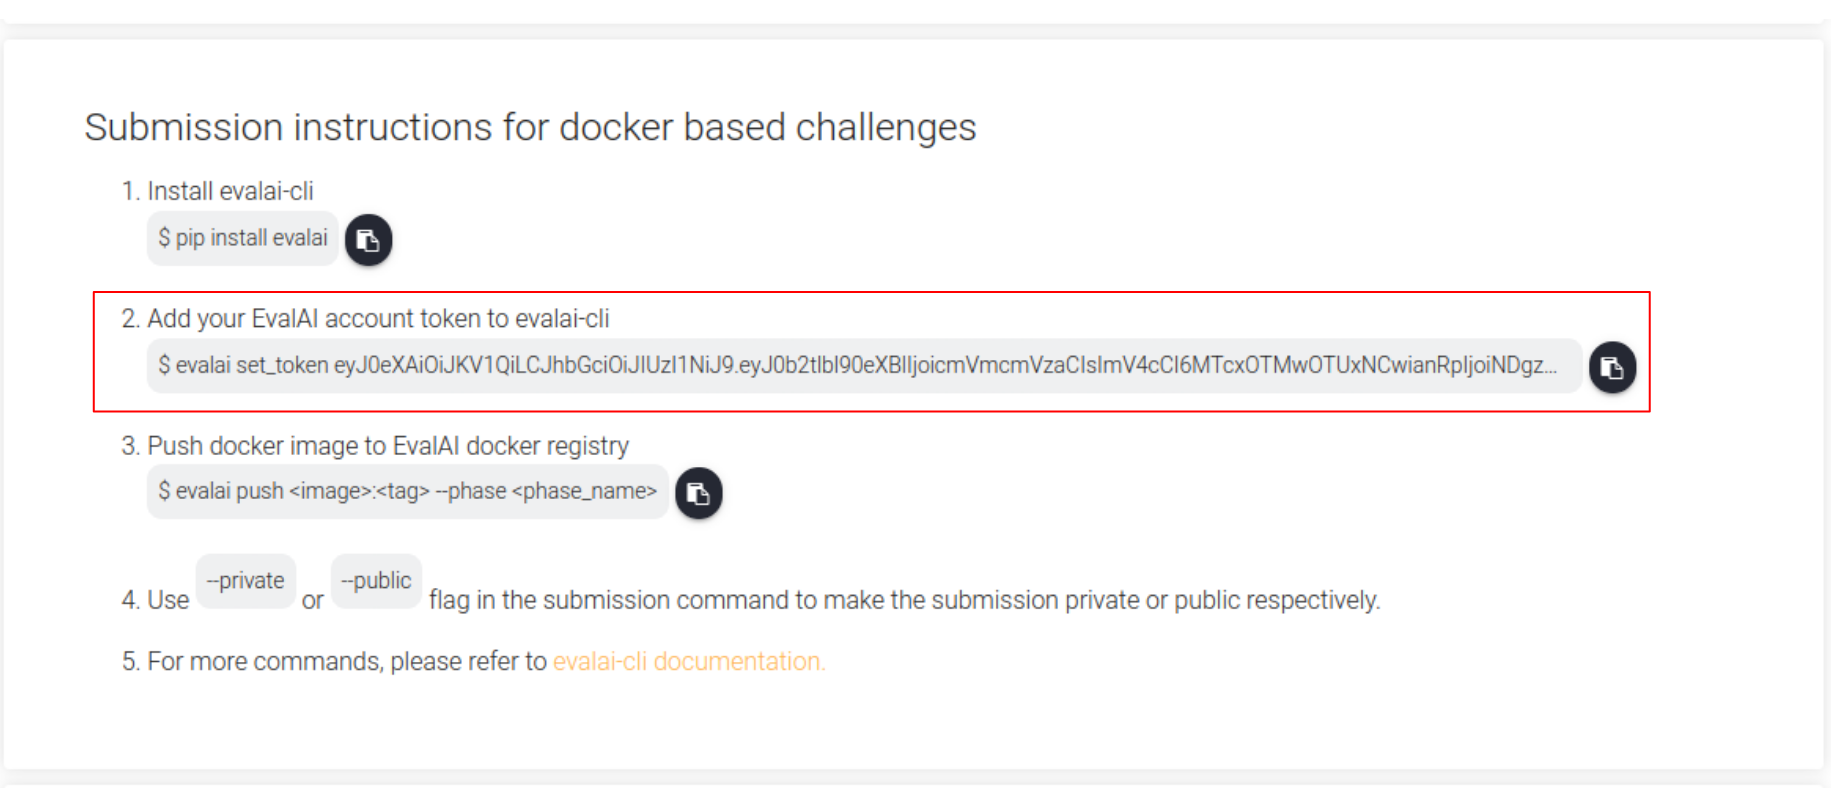
CLI submission instructions.
Please note that the token is specific to your user, each user will see a different token in this section of the website. Do not share tokens or there will be confusion over the submission author.
Use the following command to push your Docker image:
evalai push <image>:<tag> --phase <phase_name>
You can choose between one of the Leaderboard 1.0 tracks, (known as phases in the EvalAI website):
- Leaderboard 1.0 - SENSORS
- Leaderboard 1.0 - MAP
Please note that the Leaderboard 1.0 tracks may be closed to submissions during CARLA AD Leaderboard challenges
You can copy and paste directly from the section below to ensure you submit to the correct track, replace the <image> and <tag> with the appropriate values for your Docker image:
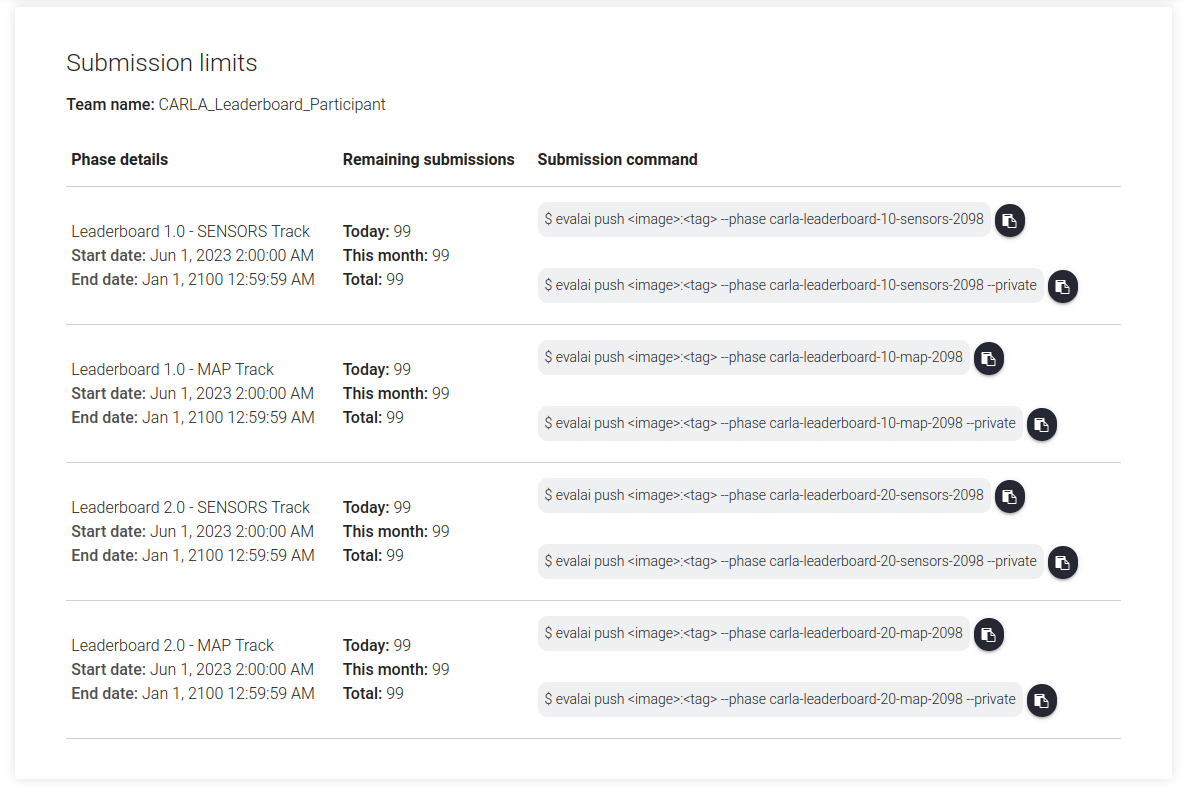
CLI commands to submit to each track.
Congratulations! You have now made a submission to the CARLA Leaderboard challenge.