Get started with Leaderboard 2.0
The information on this page concerns Leaderboard 2.0, the latest version. If you are using the previous version of leaderboard please consult the Leaderboard 1.0 get started instructions.
In order to start developing your autonomous agent you will need to complete the following procedure:
Index
- 1. System setup
- 1.1 Get the CARLA leaderboard package
- 1.2 Get the Leaderboard and Scenario_Runner
- 1.3 Define the environment variables
- 2. Create autonomous agents with the Leaderboard
- 3. Creating your own Autonomous Agent
- 3.1 Create get_entry_point
- 3.2 Override the setup method
- 3.3 Override the sensors method
- 3.4 Runtime agent-leaderboard communication
- 3.5 Override the destroy method
- 4. Training and testing your agent
- 5. Discord server
1. System setup
1.1 Download the CARLA leaderboard package
-
Download the packaged CARLA leaderboard release.
-
Unzip the package into a folder, e.g. CARLA.
In the following commands, change the ${CARLA_ROOT} variable to correspond to your CARLA root folder.
- In order to use the CARLA Python API you will need to install some dependencies in your favorite environment. As a reference, for conda, start by creating a new environment:
conda create -n py37 python=3.7
conda activate py37
cd ${CARLA_ROOT}  # Change ${CARLA_ROOT} for your CARLA root folder

pip3 install -r PythonAPI/carla/requirements.txt
The CARLA Leaderboard release is based on version 0.9.14. It also has some features of the upcoming 0.9.14 release such as the new Large Maps feature. Therefore, please refer to the latest documentation when using the API.
1.2 Get the Leaderboard and Scenario Runner
- Download the Leaderboard repository leaderboard-2.0 branch.
git clone -b leaderboard-2.0 --single-branch https://github.com/carla-simulator/leaderboard.git
In the following commands, change the ${LEADERBOARD_ROOT} variable to correspond to your Leaderboard root folder.
- Install the required Python dependencies.
cd ${LEADERBOARD_ROOT} # Change ${LEADERBOARD_ROOT} for your Leaderboard root folder
pip3 install -r requirements.txt
- Download the Scenario Runner repository leaderboard-2.0 branch.
git clone -b leaderboard-2.0 --single-branch https://github.com/carla-simulator/scenario_runner.git
In the following commands, change the ${SCENARIO_RUNNER_ROOT} to correspond to your Scenario_Runner root folder.
- Install the required Python dependencies using the same Python environments.
cd ${SCENARIO_RUNNER_ROOT} # Change ${SCENARIO_RUNNER_ROOT} for your Scenario_Runner root folder
pip3 install -r requirements.txt
1.2.1 ROS-based agents
First of all, download and install the appropiate ROS or ROS2 distribution. The Leaderboard 2.0 supports ROS Melodic, ROS Noetic and ROS2 Foxy. Afterwards, clone and build the CARLA ROS bridge repository for either ROS or ROS2. Make sure you specify the leaderboard-2.0 branch when cloning the CARLA ROS Bridge repository:
git clone --recurse-submodules -b leaderboard-2.0 --single-branch https://github.com/carla-simulator/ros-bridge
1.3 Define the environment variables
We need to make sure that the different modules can find each other.
- Open the
~/.bashrcprofile with the following command:
gedit ~/.bashrc
- Edit your
~/.bashrcprofile, adding the definitions below. Save and close the file after editing.
export CARLA_ROOT=PATH_TO_CARLA_ROOT
export SCENARIO_RUNNER_ROOT=PATH_TO_SCENARIO_RUNNER
export LEADERBOARD_ROOT=PATH_TO_LEADERBOARD
export PYTHONPATH="${CARLA_ROOT}/PythonAPI/carla/":"${SCENARIO_RUNNER_ROOT}":"${LEADERBOARD_ROOT}":"${CARLA_ROOT}/PythonAPI/carla/dist/carla-0.9.14-py3.7-linux-x86_64.egg":${PYTHONPATH}
- Remember to source
.bashrcfor these changes to take effect using the following command:
source ~/.bashrc
2. Create Autonomous Agents with the Leaderboard
2.1 First steps with the Leaderboard
The Leaderboard will take care of running your autonomous agent and evaluate its behavior in different traffic situations across multiple routes. To better understand this process, let’s run a basic agent.
- Run the CARLA server in one terminal.
cd ${CARLA_ROOT}
./CarlaUE4.sh -quality-level=Epic -world-port=2000 -resx=800 -resy=600
- In another terminal, navigate to the
${LEADERBOARD_ROOT}. While the Leaderboard is run using theleaderboard_evaluator.pypython script, the amount of arguments used can make it quite uncomfortable to directly do so using the terminal. Therefore, it is recommended to use a bash script. The Leaderboard provides therun_leaderboard.shscript, which does exactly that. Run the script:
./run_leaderboard.sh
This will launch a pygame window giving you the option to manually control an agent. Follow the route indicated by colorful waypoints in order to get to your destination. The script loads two routes in Town 12.
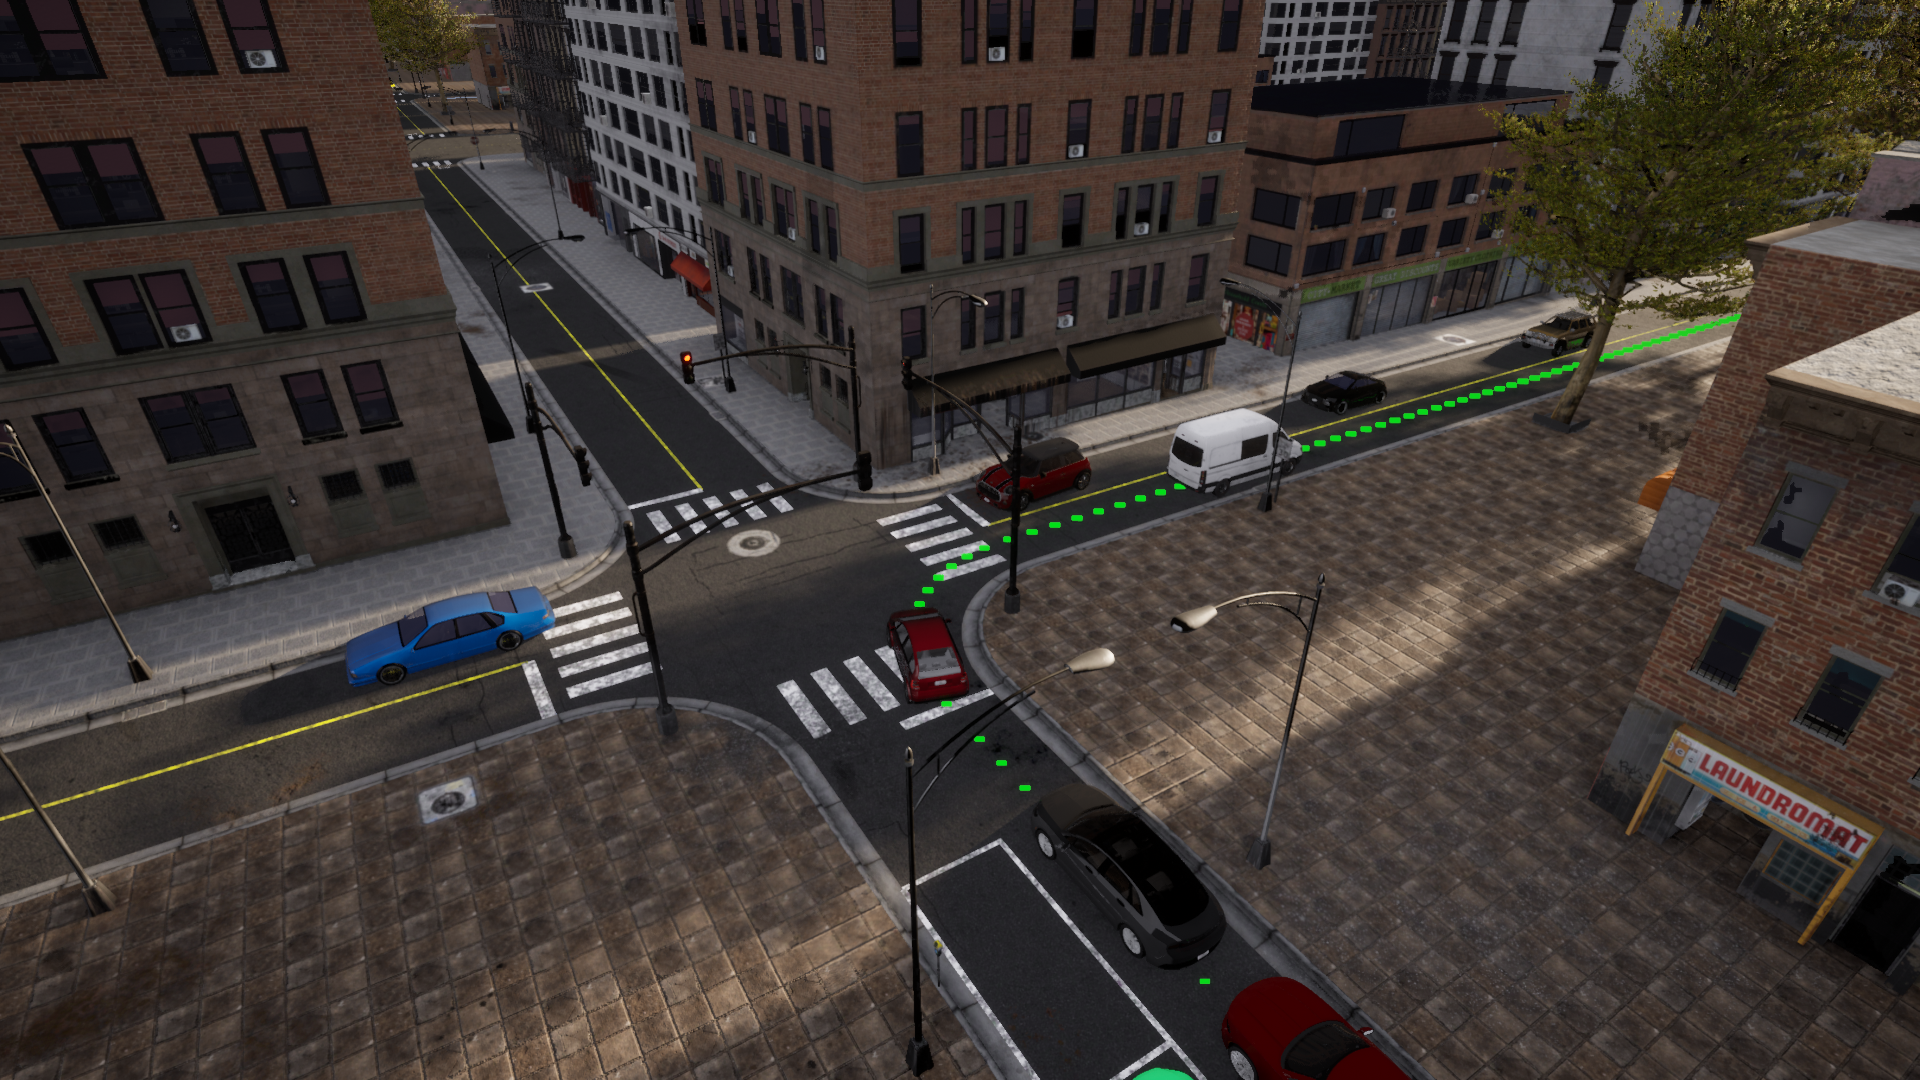
Follow the route and respect traffic rules until you reach your destination.
Manually interrupting the Leaderboard will preemptively stop the simulation of the route, automatically moving onto the next one.
2.2 Understanding the Leaderboard components
When running the test, we set a series of parameters. Let’s understand these and their role in the Leaderboard.
-
ROUTES(XML) — The set of routes that will be used for the simulation. Every route has a starting point (first waypoint), and an ending point (last waypoint). Additionally, they can contain a weather profile to set specific weather conditions. A XML contains many routes, each one with an ID. Users can modify, add, and remove routes for training and validation purposes. The Leaderboard ships with a set of routes for debug, training, and validation. The routes used for the online evaluation are secret. This file also includes the scenarios that will be tested in the simulation, each route has its own set of scenarios. A scenario is defined as a traffic situation. Agents will have to overcome these scenarios in order to pass the test. Participants have access to a set of traffic scenarios that work on the publicly available towns. There are multiple types of scenarios that are instantiated using different parameters. Here is a list of the available scenarios. REPETITIONS(int) — Number of times each route is repeated for statistical purposes.TEAM_AGENT(Python module) — Path to the agent’s Python module. The steps to create an agent are explained in the next step.
Other relevant parameters are described below.
TEAM_CONFIG(defined by the user) — Path to an arbitrary configuration file read by the provided agent. You are responsible to define and parse this file within your agent class.DEBUG_CHALLENGE(int) — Flag that indicates if debug information should be shown during the simulation. By default this variable is unset (0), which produces no debug information to be displayed. When this is set to1, the simulator will display the reference route to be followed. If this variable is set to anything greater than1the engine will print the complete state of the simulation for debugging purposes.CHECKPOINT_ENDPOINT(JSON) — The name of a file where the Leaderboad metrics will be recorded.RECORD_PATH(string) — Path to a folder that will store the CARLA logs. This is unset by default.RESUME— Flag to indicate if the simulation should be resumed from the last route. This is unset by default.CHALLENGE_TRACK_CODENAME(string) — Track in which the agent is competing. There are two possible options:SENSORSandMAP. TheSENSORStrack gives access to use multiple cameras, a LIDAR, a RADAR, a GNSS, an IMU, and a speedometer. In addition to these sensors, theMAPtrack allows for direct access to the OpenDRIVE HD map. You are responsible to parse and process the OpenDRIVE map as needed.
These environment variables are passed to ${LEADERBOARD_ROOT}/leaderboard/leaderboard_evaluator.py, which serves as the entry point to perform the simulation. Take a look at leaderboard_evaluator.py to find out more details on how your agent will be executed and evaluated.
3. Creating your own Autonomous Agent
The definition of a new agent starts by creating a new class that inherits from leaderboard.autoagents.autonomous_agent.AutonomousAgent.
For ROS based agents you can also inherit from leaderboard.autoagents.ros1_agent.ROS1agent or leaderboard.autoagents.ros2_agent.ROS2agent.
3.1 Create get_entry_point
First, define a function called get_entry_point that returns the name of your new class.
This will be used to automatically instantiate your agent.
from leaderboard.autoagents.autonomous_agent import AutonomousAgent

def get_entry_point():
    return 'MyAgent'

class MyAgent(AutonomousAgent):
...
3.1.1 Create the ROS entry point
For a ROS agent you also need to define the ROS entry point. In this entry point users can specify the package and launch file as well as the required parameters.
from leaderboard.autoagents.ros1_agent import ROS1Agent

def get_entry_point():
    return 'MyROSAgent'


class MyRosAgent(ROS1Agent):
    ....
    def get_ros_entry_point(self):
        return {
            "package": "my_ros_agent",
            "launch_file": "my_ros_agent.launch",
            "parameters": {}
        }
3.2 Override the setup method
Within your agent class override the setup method. This method performs all the initialization and definitions needed by your agent. It will be automatically called each time a route is initialized. It can receive an optional argument pointing to a configuration file. Users are expected to parse this file. At a minimum, you need to specify in which track you are participating.
from leaderboard.autoagents.autonomous_agent import Track
...
def setup(self, path_to_conf_file):
    self.track = Track.SENSORS # At a minimum, this method sets the Leaderboard modality. In this case, SENSORS
The self.track attribute should be an enum and not a string. It can only take the possible values Track.SENSORS or Track.MAP
3.3 Override the sensors method
You will also have to override the sensors method, which defines all the sensors required by your agent.
def sensors(self):
    sensors = [
        {'type': 'sensor.camera.rgb', 'id': 'Center',
         'x': 0.7, 'y': 0.0, 'z': 1.60, 'roll': 0.0, 'pitch': 0.0, 'yaw': 0.0, 'width': 300, 'height': 200, 'fov': 100},
        {'type': 'sensor.lidar.ray_cast', 'id': 'LIDAR',
         'x': 0.7, 'y': -0.4, 'z': 1.60, 'roll': 0.0, 'pitch': 0.0, 'yaw': -45.0},
        {'type': 'sensor.other.radar', 'id': 'RADAR',
         'x': 0.7, 'y': -0.4, 'z': 1.60, 'roll': 0.0, 'pitch': 0.0, 'yaw': -45.0, 'fov': 30},
        {'type': 'sensor.other.gnss', 'id': 'GPS',
         'x': 0.7, 'y': -0.4, 'z': 1.60},
        {'type': 'sensor.other.imu', 'id': 'IMU',
         'x': 0.7, 'y': -0.4, 'z': 1.60, 'roll': 0.0, 'pitch': 0.0, 'yaw': -45.0},
        {'type': 'sensor.opendrive_map', 'id': 'OpenDRIVE', 'reading_frequency': 1},
        {'type': 'sensor.speedometer', 'id': 'Speed'},
    ]
    return sensors
Most of the sensor attributes have fixed values. These can be checked in agent_wrapper.py. This is done so that all the teams compete within a common sensor framework.
Every sensor is represented as a dictionary, containing the following attributes:
type: type of the sensor to be added.id: the label that will be given to the sensor to be accessed later.other attributes: these are sensor dependent, e.g.: extrinsics andfov.
Users can set both intrinsics and extrinsic parameters (location and orientation) of each sensor, in relative coordinates with respect to the vehicle. Please, note that CARLA uses the Unreal Engine coordinate system, which is: x-front, y-right, z-up.
The available sensors are:
sensor.camera.rgb— Regular camera that captures images.sensor.lidar.ray_cast— Velodyne 64 LIDAR.sensor.other.radar— Long-range RADAR (up to 100 meters).sensor.other.gnss— GPS sensor returning geo location data.sensor.other.imu— 6-axis Inertial Measurement Unit.sensor.opendrive_map— Pseudosensor that exposes the HD map in OpenDRIVE format parsed as a string.sensor.speedometer— Pseudosensor that provides an approximation of your linear velocity.
Trying to set another sensor or misspelling these, will make the set up fail.
You can use any of these sensors to configure your sensor stack. However, in order to keep a moderate computational load we have set the following limits to the number of sensors that can be added to an agent:
sensor.camera.rgb: 8sensor.lidar.ray_cast: 2sensor.other.radar: 4sensor.other.gnss: 1sensor.other.imu: 1sensor.opendrive_map: 1sensor.speedometer: 1
Trying to set too many units of a sensor will make the set up fail.
There are also spatial restrictions that limit the placement of your sensors within the volume of your vehicle. If a sensor is located more than 3 meters away from its parent in any axis (e.g. [3.1,0.0,0.0]), the setup will fail.
3.4 Runtime agent-leaderboard communication
3.4.1 Override the run_step method (non-based ROS agents)
This method will be called once per time step to produce a new action in the form of a carla.VehicleControl object. Make sure this function returns the control object, which will be used to update your agent.
def run_step(self, input_data, timestamp):
    control = self._do_something_smart(input_data, timestamp)
    return control
-
input_data: A dictionary containing sensor data for the requested sensors. The data has been preprocessed at
sensor_interface.py, and will be given as numpy arrays. This dictionary is indexed by the ids defined in thesensormethod. -
timestamp: A timestamp of the current simulation instant.
Remember that you also have access to the route that the ego agent should travel to achieve its destination. Use the self._global_plan member to access the geolocation route and self._global_plan_world_coord for its world location counterpart.
3.4.2 ROS-leaderboard runtime communication
The ROS-Leaderboard integration is designed to work synchronously. By default, the leaderboard waits until a new vehicle command with the timestamp of the current frame is received. Vehicle commands with a repeated or old timestamps are ignored. This behavior can be changed by the user overriding the ROSBaseAgent._vehicle_control_cmd_callback. When overriding the default behavior, the user is responsible for deciding which vehicle command is applied at each step.
Vehicle controls must be published to a ROS topic named /carla/hero/vehicle_control_cmd (carla_msgs/CarlaEgoVehicleControl)[https://github.com/carla-simulator/ros-carla-msgs/blob/leaderboard-2.0/msg/CarlaEgoVehicleControl.msg]. Make sure to fill the header of the message with the correspoding timestamp.
Sensor data is also available through ROS topics. The topic name is structured as follows: /carla/hero/<sensor-id>. For a complete reference check the CARLA ROS sensor documentation.
ROS-based agents also have access to the ego vehicle route. The route is published in the following topics:
/carla/hero/global_plan(carla_msgs/CarlaRoute)/carla/hero/global_plan_gnss(carla_msgs/CarlaGnnsRoute)
Additionally, ROS-based agents must communicate to the Leadeboard when the stack initialization is finished. This communication should be done by publishing in the following topic /carla/hero/status std_msgs/Bool.
3.5 Override the destroy method
At the end of each route, the destroy method will be called, which can be overriden by your agent, in cases where you need a cleanup. As an example, you can make use of this function to erase any unwanted memory of a network
def destroy(self):
    pass
4. Training and testing your agent
4.1 Predefined training and testing routes
We have prepared a set of predefined routes to serve as a starting point. You can use these routes for training and verifying the performance of your agent. Routes can be found in the folder {LEADERBOARD_ROOT}/data:
- routes_training.xml: 90 routes intended to be used as training data (780.6 Km).
- routes_validation.xml: 20 routes intended to be used as validation data (247.6 Km).
- routes_testing.xml: 20 routes intended to be used as verification data (205.9 Km).
4.2 Training database creation tools
With the release of the Leaderboard 2.0, AV stacks will have to deal with a new set of scenarios, which are designed to be more challenging than those available in the Leaderboard 1.0. Some examples of the new situations present in the Leaderboard are route obstacles, merging and crossing actor flows as well as dealing with giving way to emergency vehicles.
However, these new scenarios are too challenging for either the TrafficManager or the PythonAPI agents, so users can no longer use any of CARLA’s own autonomous stacks to extract the training data.
As such, we are now providing a new set of CARLA logs that showcase a manual execution of each of the new scenarios, all of them with 100% score. The logs include precalculated vehicle trajectories for all elements in the scenario. You can download the logs here. Similar logs are being created for all training routes, and the currently available ones can be downloaded from here.
We also provide a script that is meant to be used along with these CARLA logs, which can be found here. This script is designed to allow the users to set their own desired sensors, automatically run any of the CARLA logs, and save the sensor’s data.
All of the configurations can be done at the top side of the script, as shown in the image below. These include the sensors used, the simulation’s weather, the recorders used and the endpoint’s folder.
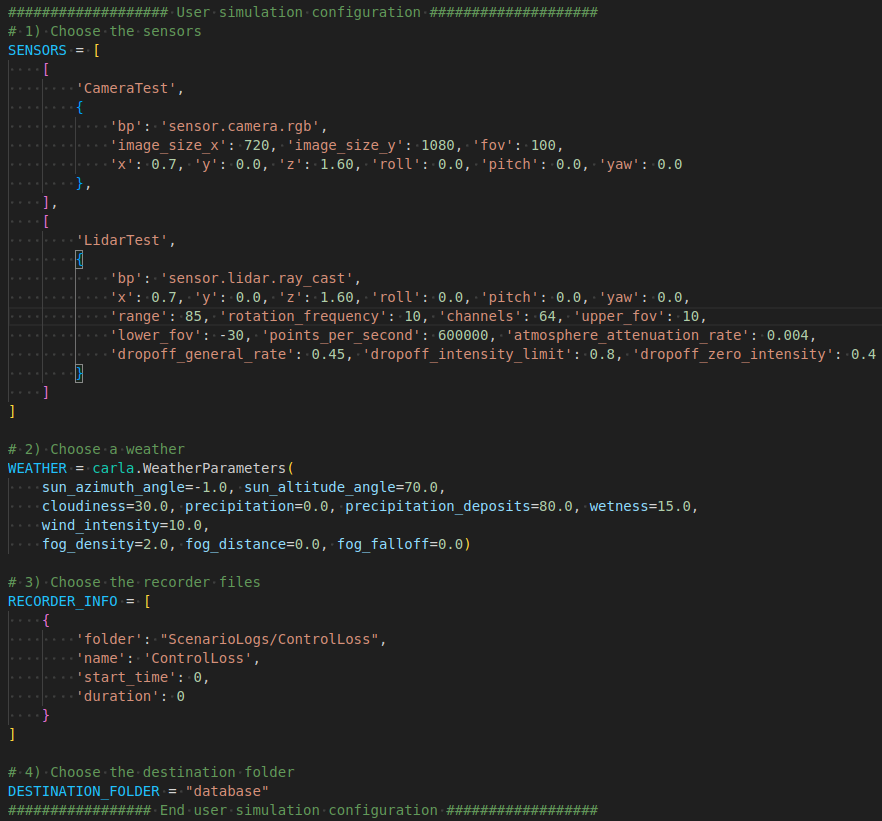
Configuration setup of the script.
Once the adjustments are finished, run the script with:
python capture_sensor_data.py
5. Discord server
We encourage all participants to join our Discord server, where anything CARLA related is being discussed. For any doubts about the CARLA AD Challenge, feel free to ask in the CARLA AD Leaderboard section, or contact any of the CARLA team members.